


The Complete High Tunnel Buyer's Guide: Design, Materials, and What Actually Matters
Are you trying to extend your growing season, but feeling unsure where to start?
Have you been researching options and wondering if a High Tunnel is actually the right fit for your farm or garden?
Maybe you’ve seen them in use and thought, “Is it really that simple—or am I missing something important?”
Choosing the right growing structure can feel overwhelming, especially when every decision impacts your time, budget, and crop success. A High Tunnel can be a powerful tool—but only if you understand what truly matters before you invest.
What a High Tunnel Is (and What It is Not)
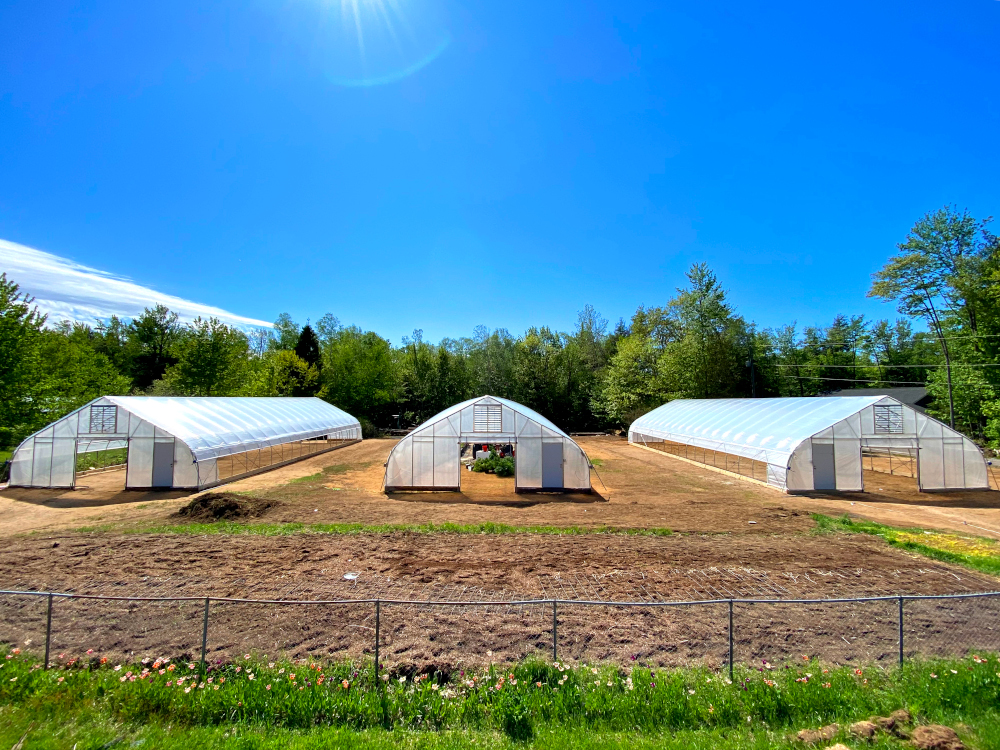
A high tunnel, also known as a hoophouse, is a type of greenhouse designed for crop production. Instead of glass and rigid framing, high tunnels are typically built from steel arches covered with flexible polyethylene plastic. High tunnels are the middle ground between open-field production and controlled-environment greenhouses. They protect crops from wind and rain, they allow for warmer soil temperatures in spring and fall, and they create improved crop quality and yield.
Unlike most solid-wall greenhouses, crops in high tunnels are usually grown directly in the ground rather than in containers or hydroponic systems.
High tunnels rely primarily on passive solar heating and natural ventilation rather than mechanical climate control.
Typical features include:
- Steel arch frame
- Polyethylene plastic covering
- Roll-up sidewalls for ventilation
- Soil-based crop production
Because they are simpler to build, operate and maintain, and less expensive than fully climate-controlled greenhouses, high tunnels have become one of the most widely used tools for season extension on small and mid-sized farms.
At the same time, they rely on good site selection, ventilation, and grower management.
Choosing the Right Size
One of the first decisions growers make when purchasing a high tunnel system is its size. Width and length both influence how the structure performs, how efficiently crops can be managed, and how well the tunnel integrates into the farm layout and work flow.
It is important to choose a size that balances usable growing space and manageable ventilation.
Width
High tunnels are commonly built in widths ranging from around 14 feet to over 30 feet.
Smaller tunnels are often used for gardens or small farms, while larger structures are typically used for commercial production.
Typical widths include:
- 14-20 feet - common for backyard growers and small market gardens
- 22-26 feet - suitable for smaller farms with limited space
- 30 feet - one of the most common widths for commercial vegetable farms
For many diversified vegetable farms, 30-foot tunnels have become a practical standard. They allow for efficient bed layouts while remaining easy to ventilate with roll-up sidewalls.
Wider tunnels provide more interior space but require stronger framing and careful ventilation design.
Length
High tunnels can be built to almost any length, but most are constructed in modular increments that match bow spacing.
Common lengths include:
- 48 feet
- 72 feet
- 96 feet
- 120 feet
Longer tunnels improve efficiency because they increase growing space without requiring additional endwalls or doors. Very long tunnels, however, can make access, ventilation, and crop management more difficult if they are not planned carefully.
Bed Layout Considerations
Many growers use permanent beds that are 30 inches wide with 12–18-inch walkways.
A 30-foot tunnel, for example, commonly accommodates:
- 8 beds with very narrow walkways
- 6 beds with comfortable walkways
- 4 beds with wider working aisles
Keep in mind that the perimeter of the structure tends to be the least productive growing area, because they will be cooler and wetter during the colder seasons. It is often best to treat the perimeter of the structure as the primary access pathway.
Planning bed layout thoughtfully makes planting, irrigation, and harvesting far easier.
Ventilation and Climate Control
Tunnel size also influences how effectively the structure can regulate temperature.
Larger tunnels have more air volume, and shelter a larger area of soil (which is the primary ballast for heat during colder months) which helps buffer temperature swings. They also require larger ventilation openings to release heat.
Roll-up side curtains are typically the primary ventilation method during the warm season. But during the winter, most growers rely on vents on the endwalls. Tunnels must be sized so that airflow remains effective across the entire length and width of the structure.
Start With What You Can Manage
Although it’s rare that growers wish they had a smaller high tunnel, most farmers eventually expand to multiple hoophouses rather than installing a single very large structure.
Starting with a manageable size allows growers to learn how tunnels behave through different seasons and refine their production systems before expanding.
For this reason, most farms begin with a 30x96 tunnel or something similar, then add additional tunnels as their production grows.
The goal when choosing a size is not simply maximizing square footage. The best tunnels are those that fit smoothly into the farm’s workflow and can be managed comfortably through all seasons.
Tunnel Shape: Gothic vs Quonset
The shape of a high tunnel has a significant impact on how it handles snow, wind, interior space, and light. The two most common forms are Gothic and Quonset.
Both designs can perform well when properly built, but they behave differently under certain conditions.
Gothic Tunnels
Gothic tunnels have a peaked roof. The steeper upper slope gives the structure a pointed profile.
This geometry offers several advantages.
- Improved snow shedding - snow tends to slide off more easily from the steeper roof angles.
- Greater interior height - the peaked shape creates more usable vertical space, usable for trellising tall crops like tomatoes or cucumber.
Because of these characteristics, Gothic tunnels are commonly used in regions that experience regular snowfall.
Quonset Tunnels
Quonset tunnels used a continuous semicircular arch from one side of the structure to the other.
This design has been widely used for decades and remains common in many climates.
Typical characteristics include:
- Smooth curved shape
- Efficient use of steel tubing
- Simple arch construction
Quonset tunnels are well-suited to areas where snow loads are light and winter conditions are relatively mild.
Interior Space Differences
Shape also affects how the interior of the tunnel can be used.
Because Quonset tunnels curve more gradually, the sidewalls slope inward earlier. This reduces usable headroom and access near the edges of the structure.
Gothic tunnels maintain more vertical space across the growing area, which can make crop management and trellising easier.
Ventilation Performance
Ventilation is primarily driven by roll-up sidewalls and endwall vents, but tunnel shape can influence airflow.
Gothic tunnels typically create slightly greater interior air volume and a more pronounced ridge, which can help warm air rise and escape more effectively when vents are open.
Choosing the Right Shape
Both designs are used successfully by growers around the world.
In general, gothic tunnels are preferred in regions with significant snow, and in systems with overhead trellising or requiring access around the inside perimeter. Quonset tunnels are less expensive, and are common in milder climates.
Steel: The Backbone of the Structure
The steel frame is what actually carries the loads. Everything else, plastic, wiggle wire, hipboards, doors, all depend on the frame doing its job.
Most high tunnels use galvanized steel tubing bent into arches. Those arches are tied together with purlins and bracing to form a single structural system. When wind pushes on the plastic or snow settles on the room, that load travels through the steel frame and down into the ground posts.
Several elements work together to create that structure: arches, purlins, braces, and truss assemblies.
Internal Bracing and Truss Assemblies
An individual arch is surprisingly flexible by itself. What stiffens a tunnel is the network of members that connect those arches together.
Most tunnels rely on several types of structural elements.
- Purlins run the length of the tunnel and tie each arch to the next. This distributes loads across the structure instead of concentrating them on a single bow.
- Diagonal bracing prevents the structure from racking when wind pushes on the endwalls or sidewalls.
- Truss assemblies stiffen the arches themselves by creating triangular load paths.
Triangles are the fundamental building blocks of strong structures. When trusses and bracing are installed correctly, the tunnel behaves as one unified frame rather than a row of independent arches.
In practice, good bracing often has a greater impact on structural performance than small differences in tube size.
Tube Diameter
Tube diameter affects stiffness. A large tube resists bending more than a smaller one. Many tunnels use tubing around 1.66 inches in diameter, which has become a common standard. Larger tubing, such as 1.9 inches, increases rigidity and reduces how much the arches flex under load.
That added stiffness can be helpful in regions with heavy snow or strong winds, particularly on outer arches where loads tend to concentrate.
Wall Thickness
Wall thickness influences long-term durability.
Thicker steel resists deformation and fatigue better as the structure experiences repeated loading from wind and snow. Over time, thinner tubing can gradually deform if a tunnel experiences repeated movement during storms.
Galvanization
Because tunnel frames are expected to last for decades, corrosion protection matters.
Most tunnel frames are made from galvanized steel, where a zinc coating protects the underlying steel from rust. This is especially important for ground posts, which remain in direct contact with soil moisture year-round.
A well-galvanized frame can last many years with minimal maintenance.
Endwall Construction
endwalls.If there is one place where a high tunnel builder learns hard lessons, it is the
The arches carry the structural loads of the tunnel, but the endwalls are where wind, doors, vents, and daily use all come together. Over time they take a lot of punishment. Doors get slammed, equipment moves through them, wind pushes directly against them during storms. If anything in the tunnel is going to loosen up first, it is usually the endwalls.
Many tunnels use wood framing in the endwalls. Wood is easy to work with, and it makes it simple to mount doors, vents, and other hardware. But after building and servicing a large number of tunnels, we have learned that wood eventually becomes the weak point.
Wood moves, swells and shrinks, screws loosen over time. After a few years of wind loading and door use, it is common to see wooden endwalls start to rack out of square, develop small amounts of flex, or give up the screws that mount wiggle wire channel or other hardware.
That is why we do not use wood for anything structural in our endwalls or anywhere else on the structure.
Instead, we frame the entire endwall structure in steel and treat it as part of the tunnel’s frame. The steel framing ties directly into the arches and baseboards so the endwall becomes a rigid extension of the tunnel rather than a separate structure attached to it.
One expected benefit is that, with the right system, steel framing can actually go together faster than wood. Our endwall members are cut so they notch together easily during installation. Once the pieces are laid out, they assemble quickly and stay aligned without the constant measuring, cutting, and bracketing that often comes with wood or steel framing.
It does require more work on the fabrication side. The laser cutting and preparation happen earlier in the process at the mill and in our shop. But once those parts arrive on site, the endwall assembly goes together smoothly and predictably.
After seeing how tunnels behave over many years, we have found that steel endwalls stay straighter, tighter, and more durable than wood-framed systems. For a structure that may stand for decades, that consistency matters a lot.
Ground Anchoring
In many situations, additional anchoring is not required. When ground posts are properly driven into reasonably firm soils, the tunnel frame and internal bracing act as a single structure. The arches, purlins, and braces distribute loads across the whole frame, and groundposts resist uplift and lateral movement.In heavier soils, especially clays or dense loams, this system is often sufficient on its own.
Conditions change, however, when soils are very sandy or when a tunnel is in a particularly exposed location. Loose soils provide less resistance to pull-out, and open sites allow wind to build more force across the structure. In those cases, supplemental anchoring can be a good idea.
Many growers assume that anchoring means pouring concrete footings. In most cases that is unnecessary and can actually create problems later. Concrete is permanent. Posts set in concrete are difficult to replace if they ever need to be repaired, and relocating the tunnel becomes much harder. For farms that may evolve over time, permanent foundations can become a liability.
Even in sandy soils and exposed sites, separate anchoring systems attached to the ground posts are usually sufficient to resist the uplift forces a tunnel experiences during high winds. The approach we use is duckbill anchors attached to the ground posts. These are toggle-style anchors commonly used to guy utility poles or support newly planted trees. Once driven into the soil and set, the anchor rotates underground and resists pull-out very effectively.
Each anchor adds a substantial amount of holding strength to the post where it is installed. In loose soil, a few well-place anchors can dramatically increase the resistance of the structure to uplift without resorting to concrete footings.
Ventilation
Adequate ventilation is critical for a high tunnel to really work.
Because these structures rely on passive solar gain, they will heat up quickly in the sun. Without adequate ventilation, temperatures can spike well beyond what crops can tolerate, even on mild days.
The good news is that passive ventilation is almost always sufficient when it is designed well. Most of the work is done by the roll-up side curtains and endwall vents.
Tall side curtains, typically around 6 feet high, allow large volumes of air to move through the tunnel. As warm air rises, cooler air is pulled in from the sides, creating continuous airflow across the growing area.
Endwall vents, such as our 3’x4’ louvered vents, help relieve pressure and allow hot air to escape more efficiently, especially on still days.
When these elements are sized correctly, the tunnel can regulate temperature surprisingly well without fans or mechanical systems.
Thermostatic Control
One of the most effective upgrades a grower can make is adding thermostatic control to side curtains or vents.
Manual ventilation works, but it depends entirely on the operator. Tunnels can heat up quickly, and it is easy to fall behind, especially during busy parts of the season or on days with variable weather.
Thermostatic systems open and close automatically based on temperature. This keeps conditions more consistent and prevents the large swings that often happen with manual operation. This means fewer temperature spikes, less crop stress, and more consistent growing conditions.
A well-ventilated tunnel with automated control will generally outperform one that relies on manual adjustments, simply because it responds continuously rather than intermittently.
Plastic Covering
The plastic covering is what turns a steel frame into a growing environment. It controls light, temperature, and how the structure interacts with wind.
For most farms, a double layer of inflated polyethylene is the best-performing option.
A double layer consists of two sheets of plastic with a small air space between them. A low-pressure inflation system keeps that space pressurized, which does two important things.
First, it improves insulation. The air gap reduces heat loss, which helps moderate temperature swings and extend the growing season.
Second, and just as important, it keeps the plastic tight. When the cover is pressurized, it does not flap or buffet against the frame in the wind. That reduces wear on the plastic.
A loose single layer will move constantly in the wind. Over time, that movement leads to abrasion and premature failure of the plastic.
Material Selection
Most high tunnels use 6 mil UV-stabilized polyethylene film, which balances durability, light transmission, and flexibility.
A common approach is:
- Outer layer: clear 6 mil poly for maximum light transmission
- Inner layer: 6 mil IR/AC (infrared, anti-condensate) poly
The IR/AC inner layer helps retain heat and reduces condensation dripping onto crops, which can improve plant health and reduce disease pressure.
Sidewalls and Endwalls
Side curtains and endwalls experience more wear and handling than the roof plastic, so they benefit from heavier materials.
Many growers use woven polyethylene in these areas because it is more resistant to tearing, better able to handle repeated rolling and handling, and longer-lasting in high-contact areas. This is especially useful for roll-up sides, which are constantly moving throughout the season.
Longevity and Maintenance
Even the best plastic will eventually need to be replaced. Most greenhouse films last 4-6 years, depending on UV exposure and climate.
Keeping the plastic tight, avoiding abrasion, and maintaining proper inflation all help extend the lifespan.
Site Selection
Where you place a high tunnel matters more than most people expect. A well-built structure can still struggle if it is sited poorly, while a modest tunnel in a good location will perform reliably for years.
The two biggest factors are wind and drainage.
Wind exposure has a direct impact on how much stress the structure sees over time. Open sites, ridge tops, and large uninterrupted fields allow wind to build force. Whenever possible, it helps to orient the tunnel so prevailing winds hit the endwalls rather than the sidewalls, and to take advantage of natural windbreaks like tree lines or nearby buildings.
Drainage is just as important. Tunnels should not be placed in low areas where water collects. A slight slope is usually beneficial, as long as it allows water to move away from the structure.
Sunlight is often less of a constraint, but tunnels should still be placed where they receive full exposure throughout the day, especially in shoulder seasons when light is limited.
A good site will reduce stress on the structure, improve growing conditions, and make the tunnel easier to work in.
Installation Options
High tunnels can be installed a few different ways, and the right approach depends on budget, timeline, and how much variability you are willing to accept.
At one end is DIY installation. This is the lowest cost, but requires time, coordination, and a willingness to work through the details. The quality of the finished structure depends heavily on how carefully it is assembled.
In the middle are guided builds, where a builder or experienced installer helps lead the process while the farm provides labor. This tends to strike a good balance between cost and consistency, and growers gain familiarity with how everything fits together and is maintained.
At the other end is full professional installation. This is the most consistent approach. An experienced crew will move efficiently and ensure the structure is square, tight, and properly braced
Long-Term Maintenance
High tunnels are simple structures, but they are not maintenance-free. A small amount of regular attention goes a long way toward keeping them performing well for many years.
Most of the work is straightforward:
- Plastic replacement - greenhouse film typically lasts 4-6 years depending on exposure and conditions
- Re-tensioning the cover - keeping plastic tight helps it shed snow and reduces wear from wind
- Hardware checks - bolts, braces, and connections should be checked and tightened if needed
- Ventilation systems - roll-up sides, vents, and motors need occasional adjustment and upkeep
- Storm inspection - before and after major weather events, it is worth walking the structure and checking for looseness or movement.
Growers who stay ahead of small adjustments and maintenance generally avoid larger problems later on, and the structure remains tight and reliable over time.
Budgeting
High tunnels are simple, but the total cost goes beyond just the price of the frame. Most projects include:
- The structure itself
- Site preparation
- Installation labor
- Irrigation and layout inside the tunnel
- Soil amendments, etc.
It is easy to focus on the lowest upfront price, but small a difference in design and materials can have a large impact over time.
A tunnel that is stronger, better ventilated, and easier to maintain will generally last longer, require fewer repairs, and perform more consistently over the life of the structure.
For most farms, the goal is not to minimize initial cost, but to choose a tunnel that will operate reliably for many seasons without constant adjustment or repair.
Build a High Tunnel That Works for You—Season After Season
At the end of the day, investing in a High Tunnel isn’t just about extending your growing season—it’s about creating a system you can rely on.
High tunnels are one of the most cost-effective tools for extending seasons and increasing productivity on the farm. Most of the long- term performance comes down to a handful of decisions made up front: how the structure is built, how it is ventilated, and how it fits the site it sits on.
Small differences in design, materials, and layout tend to show up over time. A tunnel that is strong, well-braced, properly ventilated, and well-sited will be easier to manage and more reliable season after season.
For most growers, the goal is not just to get a tunnel up, but to have one that works predictably and holds together over the long term.
When those pieces are in place, high tunnels become one of the most dependable tools on the farm
Ready to Choose the Right High Tunnel for Your Farm?
If you’re considering adding a High Tunnel or want guidance on selecting the right size, materials, or design for your operation, now is the time to take the next step. Connect with our team to get expert recommendations tailored to your goals, your land, and your growing conditions—and build a High Tunnel that works as hard as you do.